Sunday, October 19, 2014
Rewrite engines are little pieces of software that rewrite URLs for different pages within a website in order to make the URLs more "relevant-looking" and representative of content on particular pages. Joomla! features a rewrite engine, and sometimes this engine adds "index.php" to the URL. The result is a URL that may look something like the following:
http://www.yoursite.com/index.php/category/article
A lot of clients would prefer that "index.php" be removed from the URL so it looks cleaner like the following:
http://www.yoursite.com/category/article
This article offers steps to remove the "index.php" from the URL. There are two parts to the process: a few settings made in the Administration area (the back end) of the site, and some changes to one of the sites s primary folders. The second part will require the use of file transfer protocol (FTP).
Global Configuration Settings in the Back End
Changes to the htaccess file Using FTP
Global Configuration Settings in the Back End
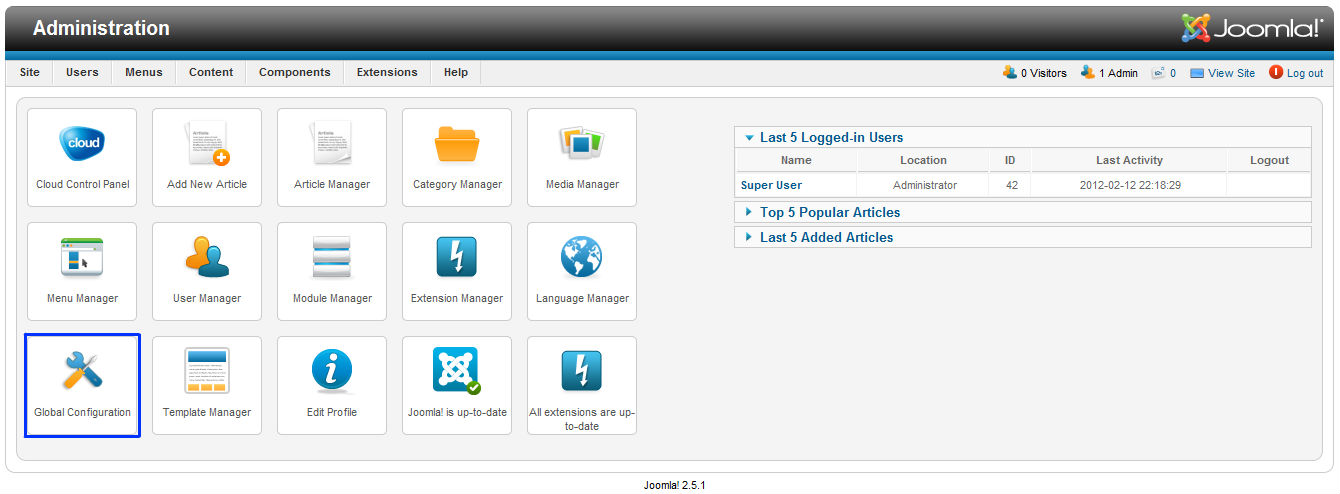
After logging into the back end of your site, go to Global Configurations.
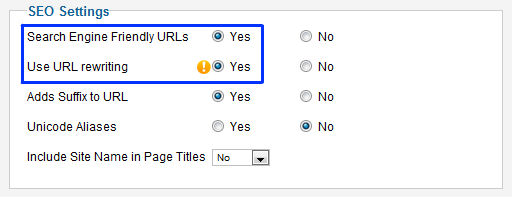
Under SEO Settings are, be sure that Search Engine Friendly URLs and Use URL rewriting are both set to "Yes".
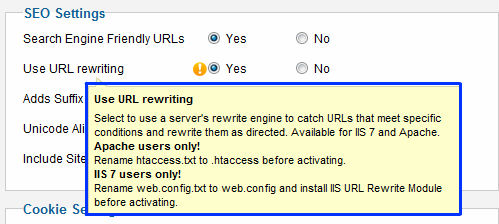
If you hover your mouse over the Use URL rewriting option, there is a text box that appears that will offer some additional guidance. As you follow steps in the next part of this article, it will be important to rename the "htaccess.txt" file to "htaccess" so the changes you make will be effective.
Back to Top
Changes to the htaccess file Using FTP
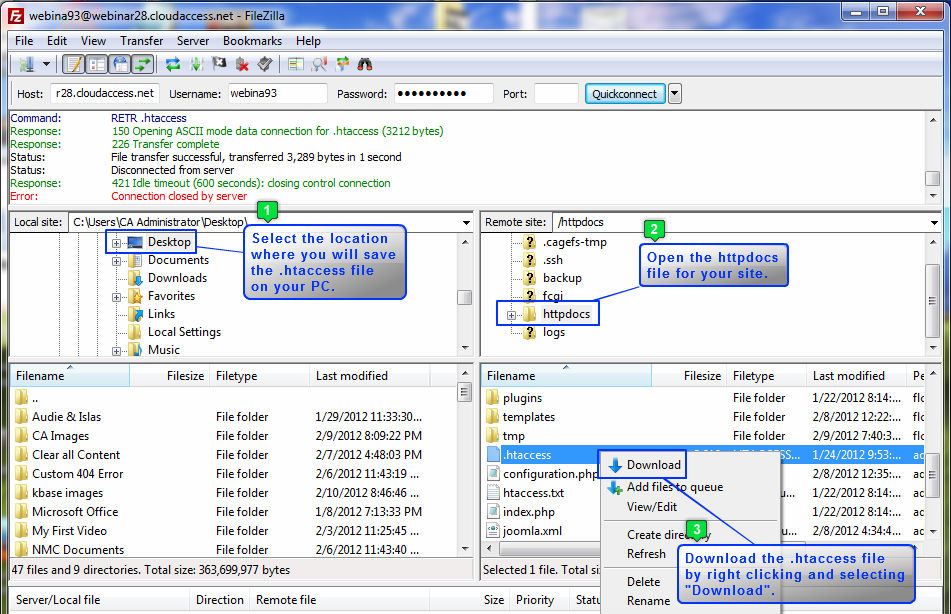
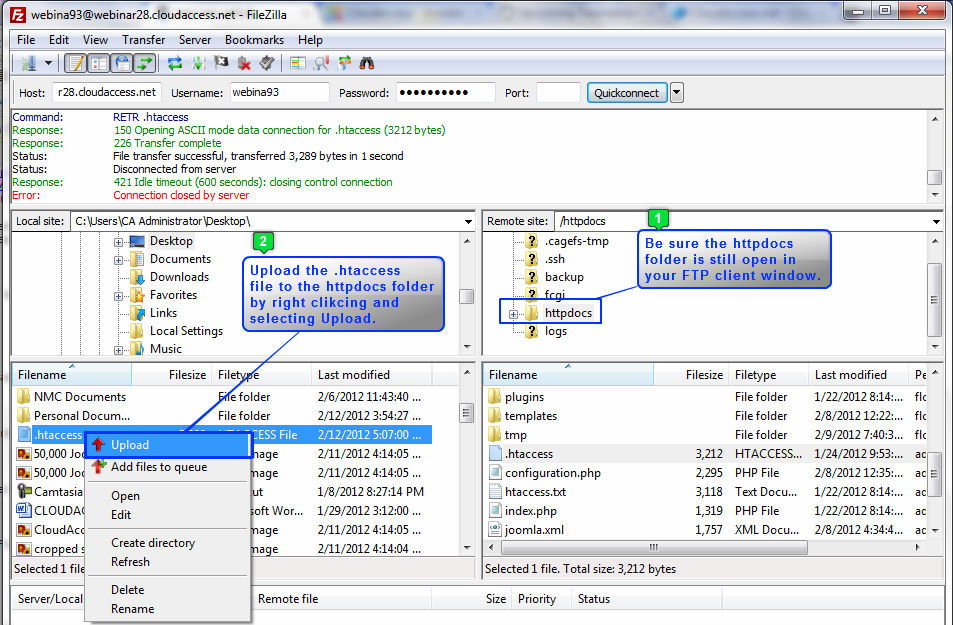
The next step is to log into your site using an FTP client. There are related resource links at the bottom of this article for additional guidance accessing and using FTP. Once you ve logged into your site using an FTP client, open the httpdocs file. You should select the area where you want to save the document on your PC so you can make some changes. Once the htaccess file is a root item in the httpdocs folder. Find it, right click on the file name, and select the "Download" option from the menu that appears. The file will appear where you saved it to your computer.
Find the file on your computer. We strongly suggest that you make a back up of the file (save it elsewhere on your computer). At this point, you will also need to rename the file htaccess if it current titled htaccess.txt. You ll have to open the file using a text editor. For the purposes of this article, we have opened the file using Notepad. Once the file is open, find the line that reads "# RewriteBase /". Delete the "#" sign from this line. Save the file.

Return to your FTP client, and replace the file that you edited. Be sure the httpdocs folder is open using FTP, right click on the file name, and select the "Upload" option.
You will have to approve the overwrite.

Return to your site, and "index.php" should be removed from the URLs on your site.
Saturday, October 11, 2014
- Make sure to run PHP 5.3 and have corresponding php.ini
- Adjust the following values inside php.ini:
max_execution_time = 300
max_input_time = 300
memory_limit = 512M
suhosin.executor.include.whitelist = phar
detect_unicode = Off
- Log into account via SSH
- cd public_html
- php -r "readfile('https://getcomposer.org/installer');" | php -c php.ini
- cd ~
- nano .bashrc
- add - alias composer="php -c ~/public_html/php.ini /home/cPanel_username/public_html/composer.phar" underneath "# User specific aliases and functions"
- Save Changes with CTRL + X >> Y
- source ~/.bashrc
- check with composer -V
Monday, October 6, 2014
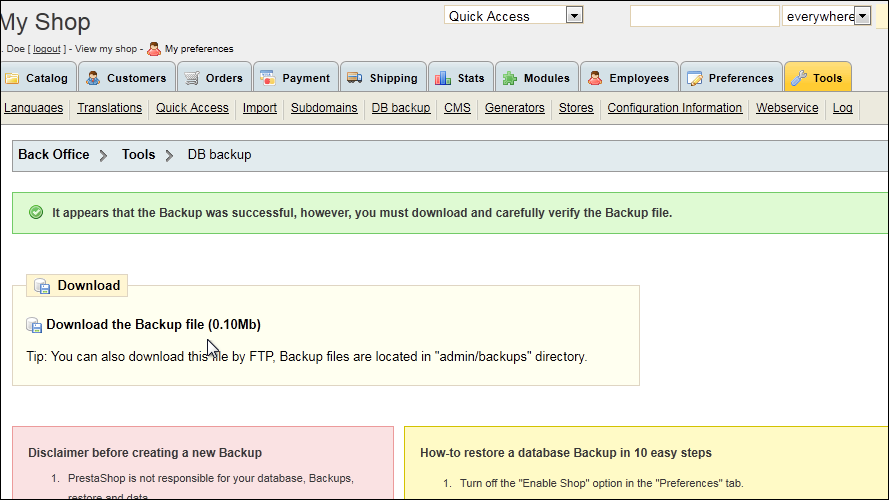
It's important to make regular backups of your site, so let's learn how to do that now.
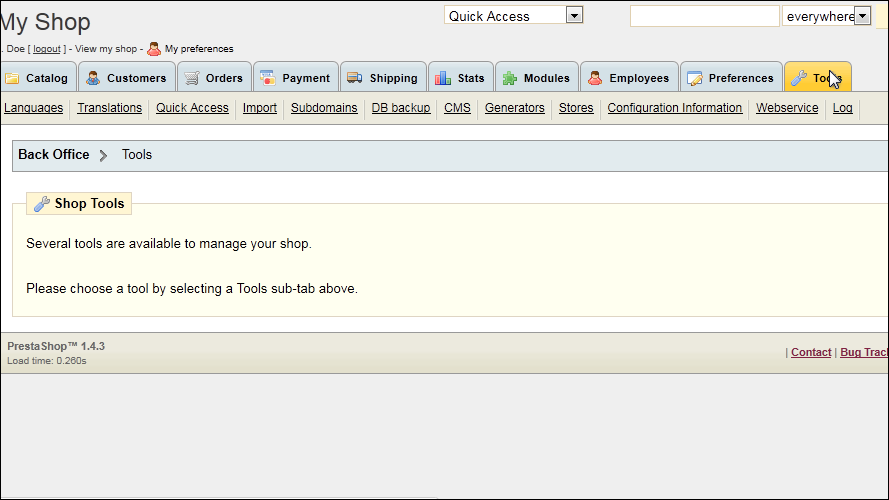
1) Go to Tools.
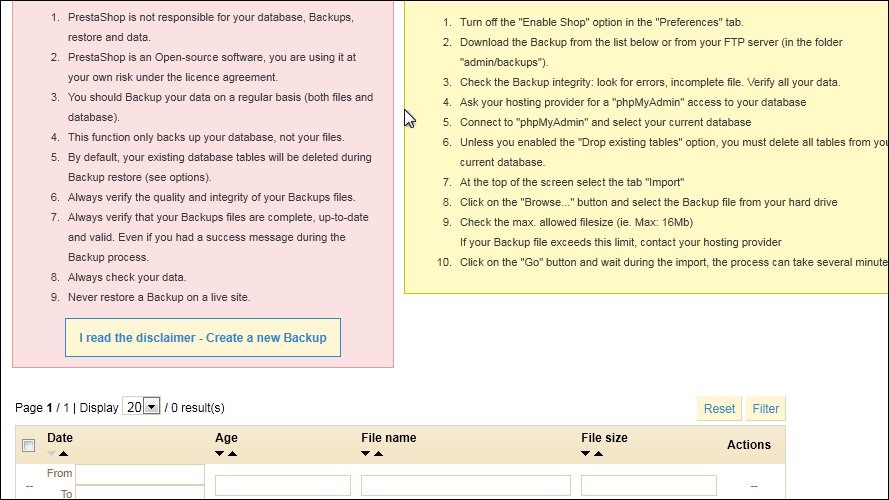
2) Click DB Backup.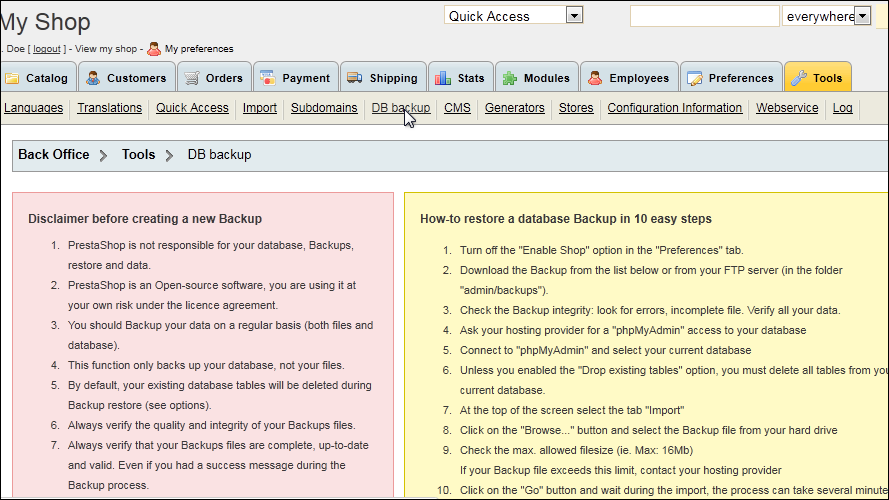
3) Click this button to continue.
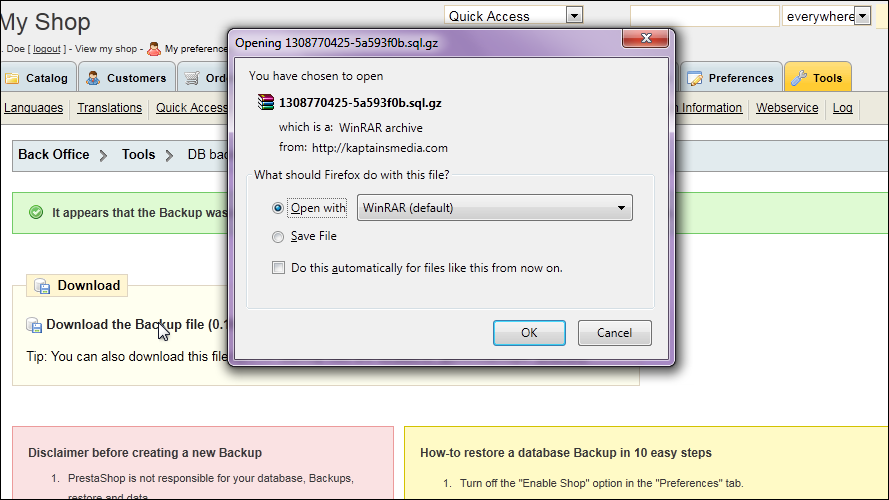
4) The backup file has been created, so click this link to download it.
5) Choose to save the file and click OK.
Now let's see how to restore a backup file.
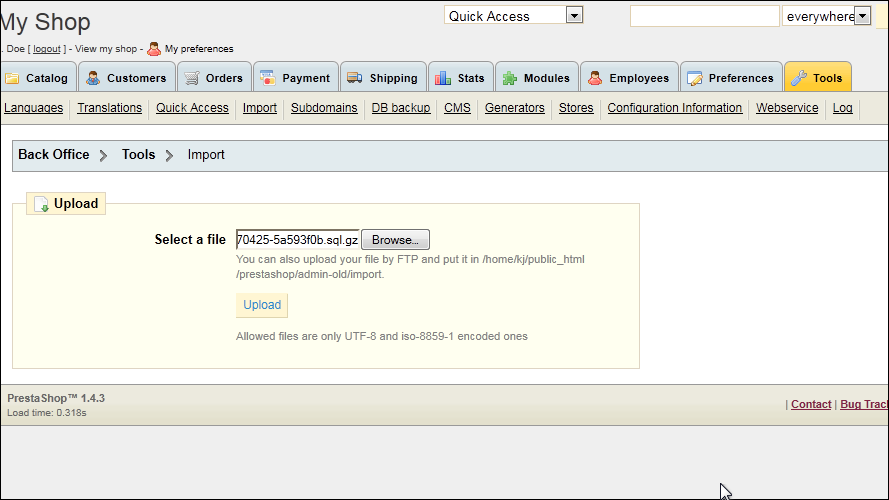
6) Click Import.
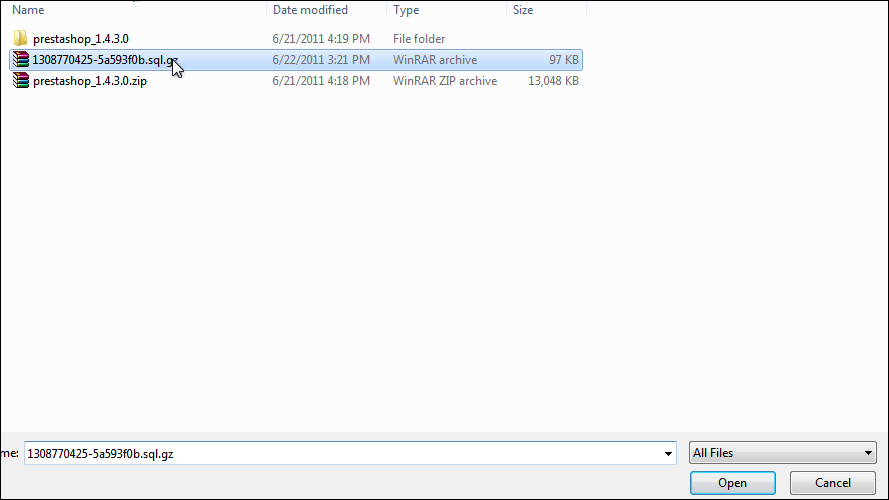
7) Click Browse.
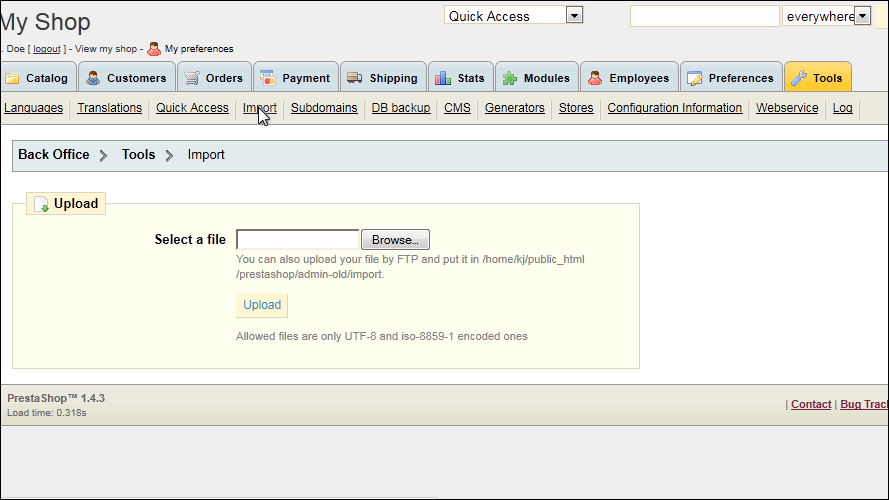
8) Select your backup file and click Open.
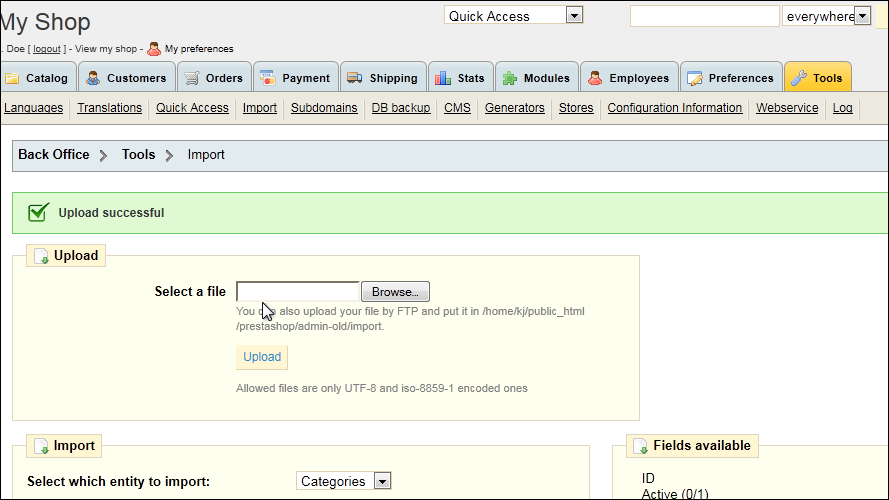
9) Click Upload.
That's it! Now you know how to backup and restore PrestaShop.
Subscribe to:
Posts (Atom)

