Tuesday, August 19, 2014

0 Comments
Posted in Arrangement, Art, Business

Change the default SSH port

The Secure Shell (SSH) Protocol by default uses port 22. Accepting this value does not make your system insecure, nor will changing the port provide a significant variance in security. However, changing the default SSH port will stop many automated attacks and a bit harder to guess which port SSH is accessible from. In other words, a little security though obscurity.


Step 1

As root, use your favorite text editor (vi) to edit the sshd configuration file.

vi /etc/ssh/sshd_config

Step 2

Edit the line which states 'Port 22'. But before doing so, you'll want to read the note below. Choose an appropriate port, also making sure it not currently used on the system.

# What ports, IPs and protocols we listen for
Port 50683

Step 3

Switch over to the new port by restarting SSH.

/etc/init.d/ssh restart
Step 4

Verify SSH is listening on the new port by connecting to it. Note how the port number now needs to be declared.

ssh username@hostname.com -p 50683

Sunday, August 17, 2014

0 Comments
Posted in Arrangement, Art, Business

How to configure your domain for Google Webmail

In order to configure your domain name to work with Google Webmail there are several steps you need to accomplish. You will need to create a new CNAME record pointing to Google in a manner similar to verifying your domain name for Google Apps.
Login to cPanel for your hosting account. Go to Simple DNS Zone Editor. Select the domain name you would like to setup with Google Webmail from the “Select a Domain” drop-down menu.
In the “Add an CNAME Record” section enter “webmail” in the “Name” text box and enter ghs.google.com in the “CNAME” text box.
Then click the Add a CNAME record button. A confirmation will appear that the CNAME was added successfully.
Now that you have configured your domain for Google Email, you need to change the Google Email URL in Google Apps so that you can access it through your domain. Follow the steps below to complete the setup:
  • Go to your Google Apps Dashboard > Email.
  • In the Web address section, click Change URL.

  • Select the second option and type the name of the subdomain you want to use for accessing your Google Email through your domain. In our case we'll leave the default subdomain mail. To proceed, click Continue. 

  • To complete the setup, click I've completed these steps.

Once your Google Email is configured and the DNS changes propagate, you will be able to access your webmail directly through http://mail.yourdomainname.com.
0 Comments
Posted in Arrangement, Art, Business

How to configure your domain for Google Calendar

In order to configure your domain name to work with Google Calendar there are several steps you need to accomplish. You will need to create a new CNAME record pointing to Google in a manner similar to verifying your domain name for Google Apps.
Login to cPanel for your hosting account. Go to Simple DNS Zone Editor. Select the domain name you would like to setup with Google Calendar from the “Select a Domain” drop-down menu.

In the “Add an CNAME Record” section enter calendar in the “Name” text box and enter ghs.google.com in the “CNAME” text box.

Then click the Add a CNAME record button. A confirmation will appear that the CNAME was added successfully.

Now that you have configured your domain for Google Calendar, you need to change the Google Calendar URL in Google Apps so that you can access it through your domain. Follow the steps below to complete the setup:
  • Go to your Google Apps Dashboard > Calendar.
  • In the Web address section, click Change URL.
  • Select the second option and type the name of the subdomain you want to use for accessing your Google Calendar through your domain. In our case we'll leave the default subdomain calendar. To proceed, click Continue.
  • To complete the process, click I've completed these steps.

Once your Google Calendar is configured and the DNS changes propagate, you will be able to access it directly through http://calendar.yourdomainname.com.

Saturday, August 9, 2014

0 Comments
Posted in Arrangement, Art, Business

How to secure WP-ADMIN

1. Create Custom Login Links

It is very obvious that in order to access the WordPress admin panel, all one has to do is type in the url of the site with /wp-login.php. Now if you used a same password in more than one location, and it was jeopardized then it is easy for the hacker to hack your site. A plugin called Stealth Login allows you to create custom URLs for logging in, logging out, administration and registering for your WordPress blog. You can also enable “Stealth Mode” which will prevent users from being able to access ‘wp-login.php’ directly. You can then set your login url to something more cryptic. This won’t secure your website perfectly, but if someone does manage to crack your password, it can make it difficult for them to find where to actually login. This also prevents any bots that are used for malicious intents from accessing your wp-login.php file and attempting to break in.
Stealth Login

2. Pick a Strong Password

This is a very obvious step, but we must mention it as it can’t be emphasized enough. Do not use the same password in other places. Try to make each password different and hard to guess. Use the WordPress Password Strength Detector to your advantage and make your password strong. Another thing you want to do is change your password periodically, so even if some has guessed your password, it is useless to them once you have changed it.
Strong Password
Excellent guide to Create Strong Passwords.

3. Limit Login Attempts

Sometimes the hacker might think they know your password, or they might develop a script to guess your password. In that case what you need to do is limit the login attempts. You can easily do so by using a plugin called Limit Login Attempts which will lock a user out if they entered the wrong password more than the specified time. They will be locked out for a specified time. You can control the settings via your wp-admin panel.
Login Lockdown

4. Password Protect WP-Admin Directory

There is nothing wrong with having two passwords. It just adds another level of security to your WordPress Admin Area. This can be done by using a plugin called AskApache Password Protect. It encrypts your password and creates the .htpasswd file, as well as setting the correct security-enhanced file permissions on both. You can also use cPanel Password Protection on a Directory if you are using a cPanel Web Host to password protect wp-admin directory.
Ask Apache Protect

5. Limit Access via IP Address

You can limit access to your WP-Admin Panel and only allow certain IP Addresses to access. All you have to do is create a .htaccess file in /wp-admin/ folder if there is not one there already. Paste the following code:
01AuthUserFile /dev/null
02AuthGroupFile /dev/null
03AuthName "WordPress Admin Access Control"
04AuthType Basic
05<LIMIT GET>
06order deny,allow
07deny from all
08# whitelist Syed's IP address
09allow from xx.xx.xx.xxx
10# whitelist David's IP address
11allow from xx.xx.xx.xxx
12# whitelist Amanda's IP address
13allow from xx.xx.xx.xxx
14# whitelist Muhammad's IP address
15allow from xx.xx.xx.xxx
16# whitelist Work IP address
17allow from xx.xx.xx.xxx
18</LIMIT>
Change the IP Address and it will work. The downside to this hack is that if you ever want to access the admin panel from some other place, you won’t be able to do so unless you add that extra IP in your .htaccess file.
Update: In the comments Henry suggested an alternate way using htpasswd and combo with the IP which will allow you to enter from other places as well.Check it out here.
6. Remove Error Message on the Login Page
Error Message
When you enter a wrong password or an invalid username, you get an error message in the login page. So if a hacker gets one thing right, the error message will help them identify that. Therefore it is recommended if you remove that error message entirely. Open your functions.php located in your theme folder and paste the following code:
1add_filter('login_errors',create_function('$a'"return null;"));
A plugin called Secure WordPress also accomplishes this and it has other features as well. Check it out to see if you are interested.

7. Use Encrypted Password to Login

When you don’t have SSL enabled, this method comes in handy. There is a plugin that lets you do this job, and it is called Semisecure Login Reimagined. Semisecure Login Reimagined increases the security of the login process using an RSA public key to encrypt the password on the client-side when a user logs in. The server then decrypts the encrypted password with the private key. JavaScript is required to enable encryption.

Monday, July 21, 2014

0 Comments
Posted in Arrangement, Art, Business

How to Migrate Emails

In this article, we will provide you with the basic information needed to move emails from one email account, to another. Because of the large number of clients available, we will be providing the basic steps one would need to perform in order to complete this transition rather than a step by step instruction article for each client.

Note: In order for this to work, the email account that we are going to copy the emails to must have IMAP support.

If you are using POP3 on the email account you are copying emails from, do not delete this account from your email client as doing so may permanently delete your emails depending on the settings your email client is using.

General Outline

Because of the way IMAP functions, it allows for 2 way communication with the server, while POP3 only allows you to receive or pull emails from the server. With IMAP we can not only receive emails, but we can push or put emails on the server. This allows us to copy emails from one inbox to another.

When using email clients that support IMAP, we can simply drag and drop the emails from one inbox to another, thus copying them. The hard part is setting both email accounts up in our client so they both work at the same time.
The Setup

If you are in the process of migrating your hosting account, the status of your domain is important. If your domain is still pointing at the old host, then you can use the following steps. If not, use the steps below.
Domain Still Pointing at Old Server

If your email client is already setup and working with the account we will be moving the emails from, then that part is done. Yay!

Now we need to look at the settings we need to use to connect to the account we will be moving the emails to.

You can find the instructions on how to connect your email client to the server by clicking the appropriate email client at the following link. Make sure that you use IMAP as the connection type!

Incoming and Outgoing Mail Server

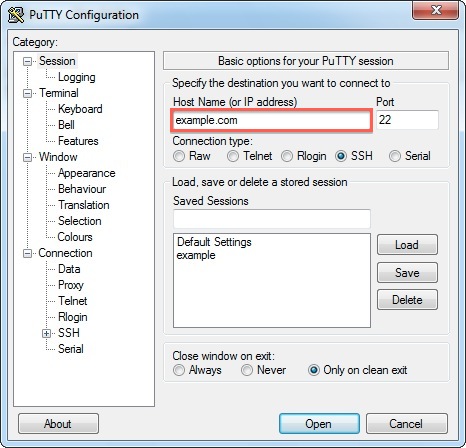
For the incoming and outgoing mail servers, you will need to use the either the IP address or the hostname of server you will be moving your emails to. This can normally be found in either your welcome email or your control panel (SiteAdmin or cPanel).

Connection/Account Type

As we stated earlier in the article, in order for this process to work, we must use IMAP.

You may use all the other as indicated in the mail client article for your client.
Domain Pointing towards new Server

If you domain is now pointing towards the new server, it is very likely that your email client is also connecting to the new server. Because we can’t assume anything, we need to check the settings and confirm what’s going on.

Please open the settings for your email account in your mail client.

There are 2 main things we need to check…
1. Are we using POP3?
If we are using POP3, than you most likely already have all of your email downloaded and you should not have to do anything with your client. If you wish to sync the emails to the server (so you can read them using webmail or other email clients … e.g. your phone), you will need to add the email account to your mail client again (do NOT delete your current working account) but using IMAP as the connection type. For information on how to do this, please see the following link and pick your client from the list.
2. What is our incoming/outgoing mail server?
If your incoming mail server is something like “mail.example.com” (where example.com would be your domain), than you are already most likely connected to the new hosting account. If you are not using POP3, it is very possible that your emails have disappeared. In this situation, we will need to add a new email account to your mail client and re-connect to your old server. Please read the following information on how to do this…
1. Contact your old hosting provider (unless you know already) and ask for the IP address of your hosting account with them. You will use this as the incoming and outgoing mail servers.
2. Setup the account in your email client using the IP address.
3. Move to the copy section of this article.


Make the Copy

Now we move to the easiest part of this article, the copy. Most email clients support this function and they all make it easy to execute.
1. Open the inbox you wish to move emails from
2. Select all the emails (Shift + Click or Ctrl + A)
3. Drag them to the inbox of the account you wish to move them to
4. Wait for the copy to finish
5. That’s it! All of your emails should now be on the new account. A good way to test this is to use webmail to make sure they all appear correctly.

Sunday, July 20, 2014

0 Comments
Posted in Arrangement, Art, Business

FileZilla: How to Limit the Number of Simultaneous Connections


In this article, we will show you how to limit the number of connections FileZilla uses.
1) Start FileZilla
2) Click File
fz_connectionlimit_1
3) Click Site Manager
fz_connectionlimit_2
4) Select your FTP Site from the left-hand menu
fz_connectionlimit_3
5) Click the Transfer Settings tab
fz_connectionlimit_4
6) Check the box for “Limit number of simultaneous connections” and select the number of connections you wish to limit FileZilla too.
fz_connectionlimit_5
That’s it!

Monday, June 23, 2014

0 Comments
Posted in Arrangement, Art, Business

Using SSH on Windows (PuTTY)

Using a Public/Private key to authenticate when logging into SSH can provide added convenience or added security. The Public/Private key can be used in place of a password so that no username/password is required to connect to the server via SSH. Instead the unique public and private key provide the secure authentication. The keys may also be generated with a different password from your cpanel password if desired.


Generate a Public/Private Key Pair

  1. In cPanel click on the SSH/Shell Access icon under the Security category.

  2. SSL/TLS Manager

  3. Open the Manage SSH Keys tool.
  4. Click Generate a New Key and complete the fields shown. We recommend the RSA key type and a 4096 bit key size for maximum security. 
    Note: There is bug in cPanel at this time that does not allow you to create a 2048 or 4096 bit DSA key
  5. The location of the newly generated public and private key will be shown as well as the key fingerprint.
  6. Click Go Back.
  7. Next to the Public Key you generated, click Manage Authorization then click Authorize to activate this public key.
  8. Click Go Back.
  9. To the right of the Private Key, click on View/Download. Then click the Download Key button. Save the file to your computer and click go back.
You may now use the private key saved on your computer to SSH securely to our server. If you are using PuTTY, please see the configuration steps below.

Generate a ppk file

  1. Download and open PuTTYgen from the PuTTY Download Page
  2. Click Load

  3. Load Your Private Key

  4. Locate the private SSH key that you have downloaded.
  5. Note: You will need choose to display All Files* from the menu to the right of the File Name field.
  6. Enter the password for your SSH Key

  7. Enter the Passhrase for your SSH key

  8. Click the Save private key button to create the ppk file.

  9. Save the PPk file

Configuring PuTTY

  1. In PuTTY, under Session, enter your Host Name

  2. Enter your Domain Name or IP Address

  3. Under Connection choose Data
  4. Enter your cPanel username as the Auto-login username

  5. Enter your cPanel username

  6. Under SSH, choose 2 from Preferred SSH Protocol Version
  7. Under SSH -> Auth, you will need to specify where your private key can be found. Remember this is where you saved the private key on your local computer. Click Browse to locate the file on your computer.

  8. Click Browse to locate your ppk file

  9. Under Sessions, type a name (such as "my site") in the Saved Sessions box and click Save.

    Blogger news

    Blogroll

    About